Recording and Streaming in classrooms
This page explains how Medial integrates with classroom technology at Masaryk University (MU) and provides best-use guidelines. Note that these instructions apply exclusively to MUNI’s setup.
To learn more about medial platform, see introduction to Medial.
Warning
Upon entering the classroom, always activate the projectors via control panels first. Logging into the computer before projectors are fully turned on can cause errors since projectors typically require slightly more time to start up.
Classrooms Technology
Control panels
Note
Control panels are available in two versions—analog button panels and digital touch screens. Buttons are generally identical across versions, but touch screens require pressing “Zapnout systém” (‘Turn on system’) first.
The control panels may vary in button options, these include:
- On or “Zapnout”: Activates the projector.
- Off or “Vypnout”: Deactivates the projector.
-
Ztmavit next to signs “Pravý projektor” (Right Projector) and “Levý projektor” (Left Projector) means to dim the said projector.
Note
In larger classrooms with dual projectors, two control panels are available—one per projector.
-
PC: Projectors will show the classroom computer screen.
- Audio Only: Allows you to play the audio only – without projecting video.
- VGA/HDMI: Switches to a connected device (laptop) using VGA or HDMI.
- Apple TV: Enables wireless screen mirroring via Apple TV.
- Freeze: Freezes the current image on the projector - you can use this funtion, when you wish to do something on your computer that students should not be able to see.
- Světla přední: Controls the front lights in the classroom. Allows to dim the lights around the projector, so the sceen is better visible. Alternatively, you could see buttons “zatemnit” for diming them and “odtemnit” for turning them back on instead.
- Record, Záznam or Spustit záznam: Starts the recording of your session via Medial. Recordings shorter than one minute won’t be saved.
Hybrid-Classroom Specific Controls
These buttons are available in classrooms equipped for simultaneous in-person and online lectures only:
- TV or TV On: Turns on the ceiling TV facing the lecturer. The TV is connected to the tablet (mirrors its screen) next to the computer. Lecturers can use the TV to display notes for their lecture, or to display the window of online students stream to see their faces during lecture.
- Přední kamera: Switches to the front camera, so the the audience’s faces are shown in the video. If you turn on the Tracking while using this camera, it will automatically track the source of the sound (the speaker).
- Zadní kamera: Switches to the back camera, so the backs of the audience and face of the speaker are shown in the video. If you turn on the Tracking while using this camera, it will automatically track the human shape in the front of the classroom (usually the lecturer).
- Tracking on/off: Turns on and off the tracking of both front and back camera as previously mentioned. If tracking focuses on the wrong person and won’t switch, you can re-start the camera tracking process by pressing this button again to turn the tracking off, and then once more to turn it back on.
Microphones
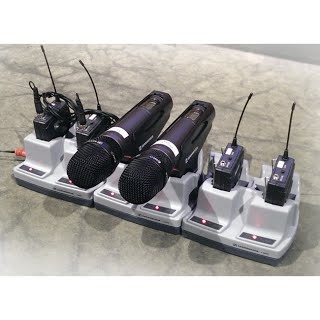
Classrooms may have different microphone types. All microphones, except ceiling-mounted ones, are stored in the lecturer’s desk. Most classrooms allow access to them using your ITIC/ISIC card, though some require a key. After use, please ensure microphones are returned to the charger correctly (indicator light should turn on) so they are ready for the next lecturer.
Below is a list of available microphones based on the building or the specific classroom:
| Building / Classroom | Type of microphone |
|---|---|
| A | Ceiling Microphone |
| A11 | Lapel and Handheld Microphone |
| A31 | Lapel Microphone |
| B | Ceiling Microphone |
| C | Lapel Microphone |
| C11 | Lapel and Handheld Microphone |
| D | Lapel and Handheld Microphone |
| D32, D33, D42, D43 | Lapel Microphone |
| G | Lapel Microphone |
| G03 | No microphone |
| G24, G32 | Lapel and Handheld Microphone |
| J | Lapel Microphone |
| K | Lapel Microphone |
| L10, L11, L21, L35, L42 | Lapel Microphone |
| L31, L32, L33, L34, L41 | No microphone |
| M | Lapel Microphone |
| M21 | Head and Handheld Microphone |
| N21, N41, N51 | Lapel and Handheld Microphone |
| N31, N42, N43 | Lapel Microphone |
Warning
There are two types of the Ceiling Mounted Microphone. The table above shows only the second type (the microphone available in the hybrid classrooms), while the video bellow shows the first type (the microphone available in most of the classrooms).
How to use microphones
How to handle microphones properly is explained in the following video, which includes English subtitles for non-Czech speakers.
Ceiling Mounted Microphone
There are two types of the Ceiling Mounted Microphone:
-
The first type is availible in most of the classrooms. This microphone activates automatically if no other microphone is in use, but has low sound quality, making it unsuitable for recordings. This specific microphone is shown in the previous video.
-
The second type is availible in the hybrid classrooms mentioned earlier. This microphone is advanced equipment providing high-quality sound and capturing the whole classroom. If you’re recording in a hybrid classroom, this section of the user guide can be skipped. Simply follow the instructions in the brochure available in the classroom.
Head Microphone
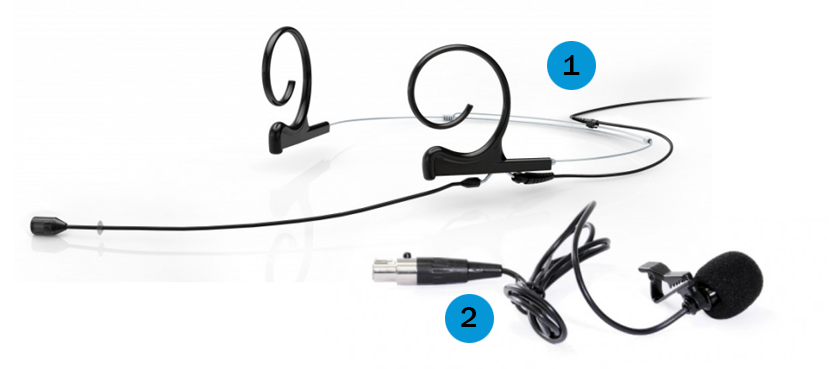
The head microphone, worn around the ears, should be positioned about 3 cm from the mouth. It is connected to a receiver, that can be either clipped to a belt or kept in a pocket. Controls for the microphone are located on the receiver.
Lapel Microphone
The Lapel Microphone (See the picture 2) should be attached to clothing with a clip, ideally placed near the collar to prevent rubbing against fabric. Like the head microphones, lapel microphones have controls on the receiver.
Receivers
Receivers are compact devices connected to wireless microphones, enabling sound transmission to speakers or recording systems. They are typically clipped to a belt or placed in a pocket. They include controls for adjusting the microphone settings and are used with both head and lapel microphones.
You may encounter two types of receivers. The first type opens by pressing two buttons to access the battery compartment.
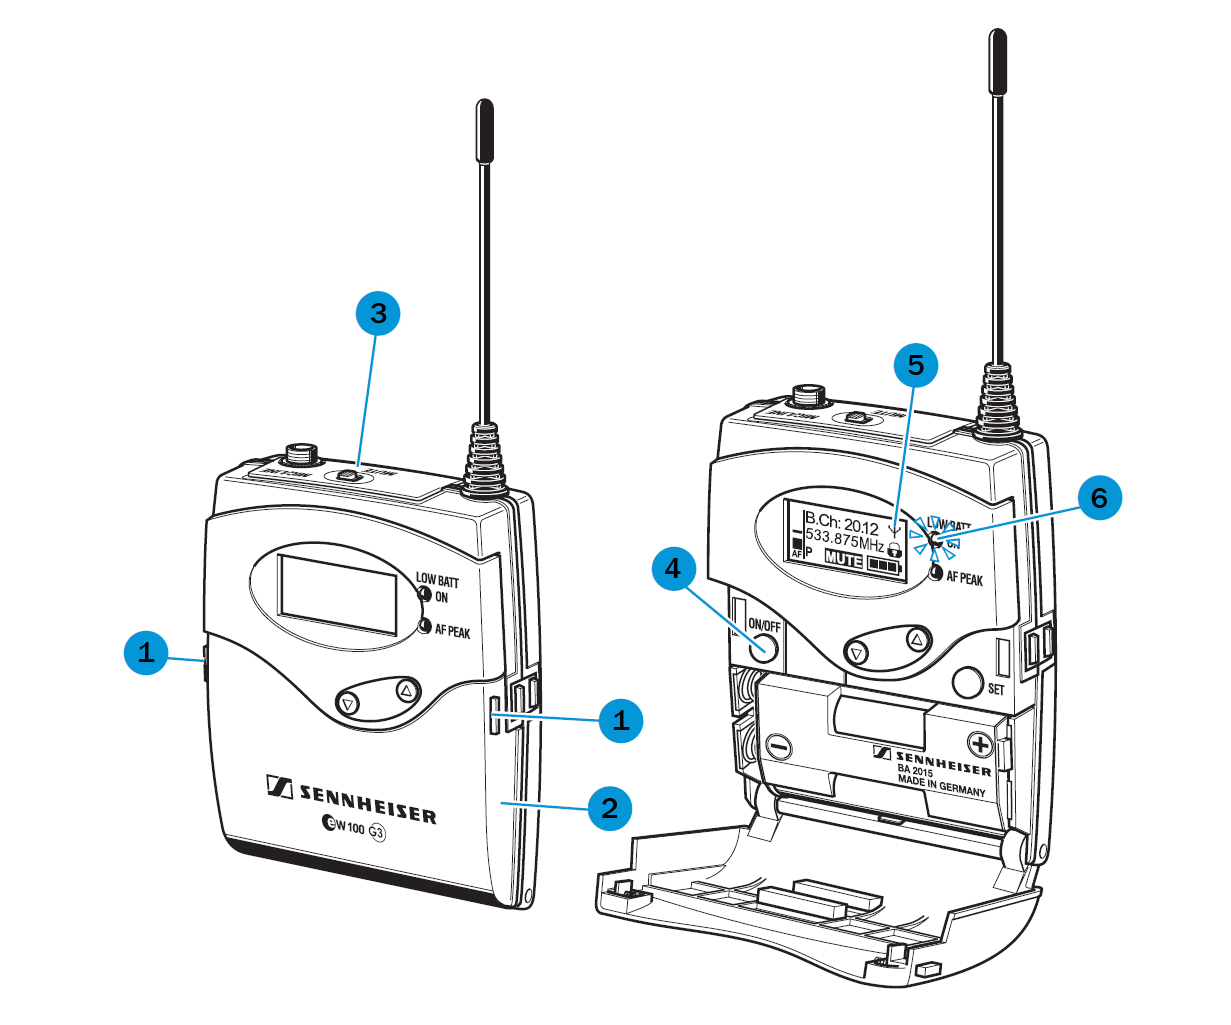
To open the first type (See picture 3) of the receiver, press the two buttons (1) simultaneously to release the battery cover (2). Inside, you’ll find the power button (4). Hold the “ON/OFF” button to turn the device on or off. The display (5) will show key information, including whether the microphone is muted (indicated by “MUTE”) and the battery level. You can adjust the volume with the switch (3) on top of the receiver. If the battery is low, a red light (6) will blink, signaling the need for a replacement.
The second type (see picture 4) typically turns on automatically when removed from the charging station.
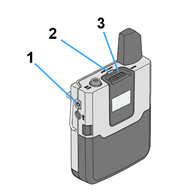
After removing it from the charging station, wait a few seconds for the indicator light (2) on top of the receiver to turn green. If the light doesn’t come on, turn on the microphone with a short press of the ON/OFF button (1). If the light is yellow, the microphone is muted. You can unmute it by flipping the MUTE switch (3) on top of the receiver. To turn off the microphone, hold the ON/OFF button (1).
Some classrooms in buildings K and L feature a wireless lapel microphone connected to the podium PC. This microphone can be used with applications on the computer. It is suitable for videoconferencing.

You can turn the wireless microphone on or off by holding the ON/OFF button on the side of the receiver (see picture 5, point 1).
To check which rooms have these microphones, consult the FF MU classroom catalog.
Handheld Microphone
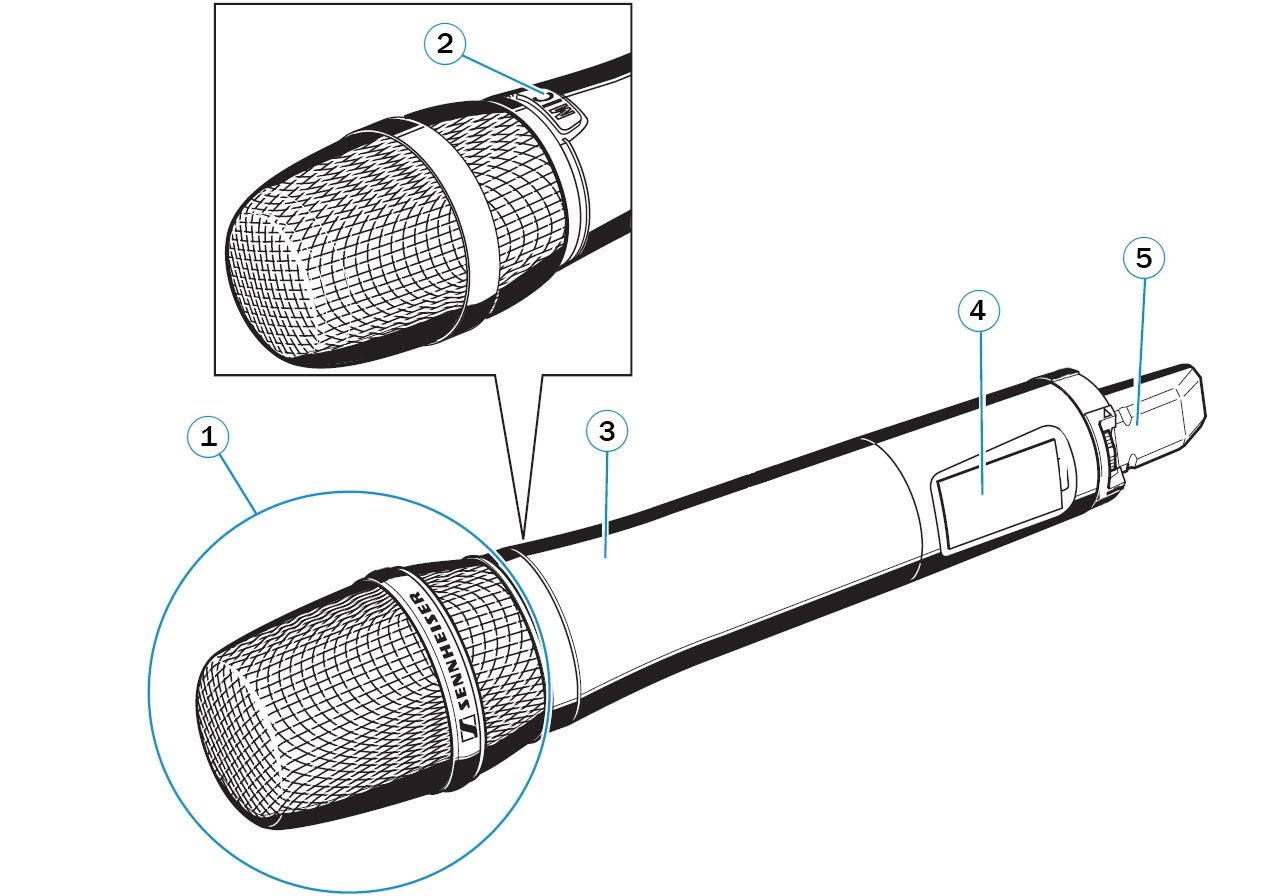
The handheld microphone consists of the microphone head (1), the mute button labeled accordingly (2), the body of the microphone (3), a display (4) that shows information such as battery status, and the microphone antenna (5). Hold the microphone in a way that ensures the antenna and the display are not covered.
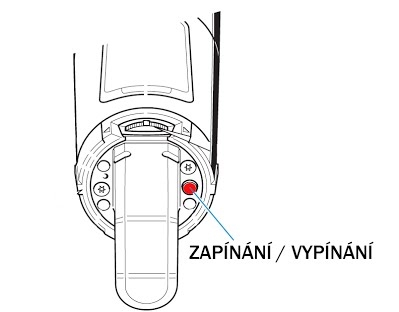
You might encounter two types of handheld microphones. The first type powers on by holding the red button at its base (see the picture 7), causing the display to light up orange. Ensure the “MIC” button is red while using it; if it’s not, the microphone is muted.
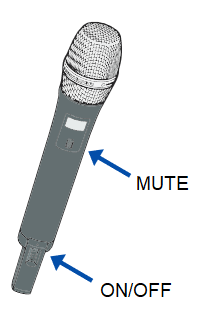
The second type (see the picture 8) typically turns on automatically when removed from the charging station. If the light below the display is green, it’s ready to use. If it shows yellow, press the MUTE button to activate the microphone. To turn off second type of hanheld microphone press and hold the ON/OFF button.
Recording
To record your lecture using classroom technology, first confirm you’re using the correct microphone and camera as specified in the classroom manual, and ensure all equipment is functioning—following tips from the previous video is recommended.
Next, press the “Record” or Záznam button to start. Ensure the video is at least one minute long, anything shorter won’t be saved. Press the same button again to stop recording.
Once recording is complete, the video will be stored in Medial . You’ll receive an automatically generated email confirming the video has been saved. To access the video, log into Medial with your university credentials. You will find it in your account.
Warning
The recording is owned by the person signed into the computer during the recording.
Online streaming
In addition to recording lectures, classroom equipment also supports live streaming. Streaming lets others watch your lecture live, even if they can’t attend in person. The classroom camera captures the lecturer, and if the projector is on, its content is also included in the stream for clarity. Using a microphone ensures the quality of the sound.
Unlike recordings, which lecturers can manage independently, streaming setup is handled by the E-learning Office. To schedule a live stream, email elf@phil.muni.cz at least three days in advance with the stream’s date, classroom, and time. Optionally, you may include a brief description and a thumbnail image.
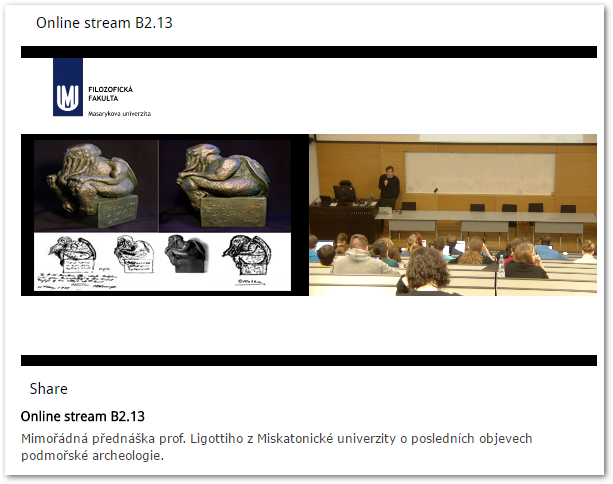
Streams are accessible in Medial’s media library. When a stream is live, a “Live” button appears in the navigation bar.
Stream channels are named after the classroom they are broadcasted from, and are available to all Medial visitors, including guests without login credentials.
Streaming outside the Medial platform
To stream on public platforms like YouTube or Facebook, you can use OBS program, which is pre-installed and configured on classroom computers.
-
First, create a streaming channel on your chosen platform (for example YouTube or Facebook) and obtain a streaming key.
-
Log into the classroom PC, open OBS.
Pic. 11: OBS icon -
Go to “Soubor” > “Nastavení”. (File > Settings).
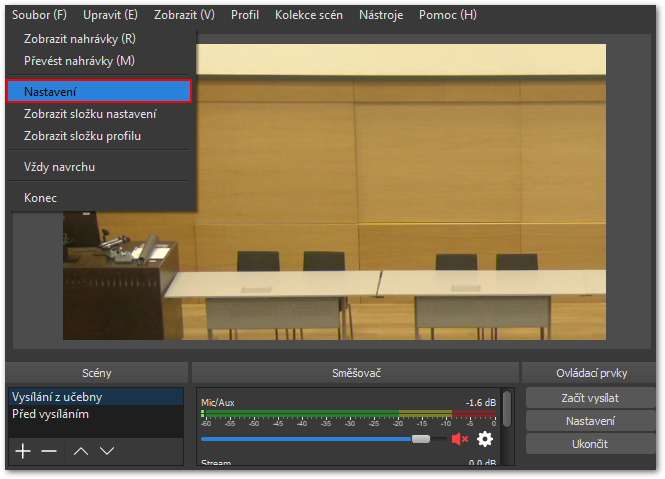
Pic. 12: Settings - Under the Stream tab (Vysílání), select the platform you plan to use (for example Youtube).
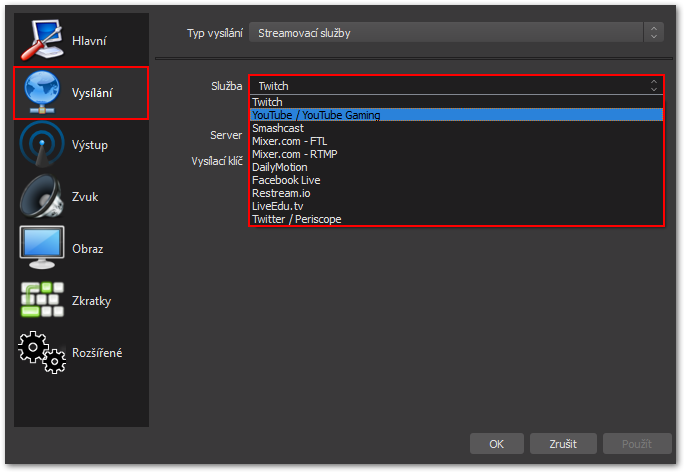
Pic. 13: Choose the platform.
- Under the Stream tab (Vysílání), select the platform you plan to use (for example Youtube).
-
Enter the streaming key (vysílací klíč) a click on “OK”.
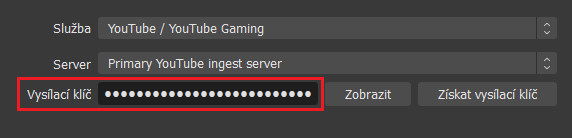
Pic. 14: Enter the copied streaming key -
Click on Začít vysílat (Start Streaming). Do not forget to also begin streaming on your choosen streaming platform (for example Youtube).
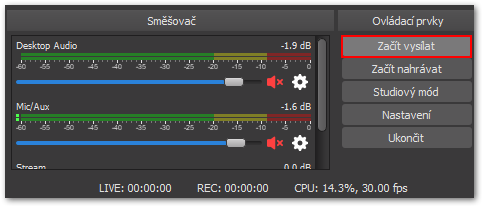
Pic. 15: Start streaming -
OBS has two preset scenes: Vysílání z učebny (Classroom Streaming) for camera and projector footage, and Před vysíláním (“Pre-stream” showing only MUNI logo) for a waiting screen. You can switch between them as you want.
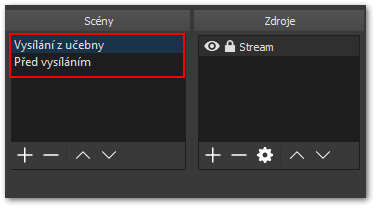
Pic. 16: Switching the scenes